Author: Jill McCauslin (Page 4 of 23)

Lava Shorts Review

I’ve been using my Lava Shorts for a while now and thought I should write a review of them.  I’m not a strong swimmer but I’ve been trying for a while now.

Lava shorts are basically wetsuit shorts. They’re made from neoprene. The point of wearing them is that they help make you more buoyant. They lift your hips to help with swimming. Since you can’t wear a wetsuit in a pool, these shorts help simulate that to help with training for open water swimming.

lava shorts

For some reason, I blocked on the name Lava Shorts and simply called them my “floaty pants.” They do make a noticeable difference in your swimming style.

I think if you’re training for a triathalon or if you have issues with keeping your hips up while swimming, investing in these shorts is worthwhile.

They’re not particularly inexpensive. I found them on Amazon at around $80.

Here’s what I dislike about them. The Lava Shorts are unisex so that supposedly they fit both men and women. I think they’re actually designed for men and it was easier to say they’re unisex.

I had to go up in size to get a pair that fit my hips. When I wear them, I really need to yank tight the string tie at the waist because they feel like they’re going to fall down. Basically, they fit around my hips but then the waist is weird. They don’t actually reach my waist. They hit me between my hips and waist so they feel awkward.

I don’t want you to think that they’re loose because they’re not. I squirm around to get them on and then tighten up the waist as best I can. That’s the nature of neoprene suits. They’re supposed to be snug.

Once I’m in the pool, they don’t feel too bad though I notice that I am sometimes tugging them up when I stop swimming. I have had them work loose and had to stop to yank them back into place. Nothing like standing in a pool, pulling your shorts back up.

I’ve never mastered flip turns so I can’t tell you how these do with them.

If you need help with elevating your hips in the water, try these or if you know you’re going to be wearing a wetsuit in open water, try these.

I’m not sure they’re worth the investment if you just want to swim laps.

If you wear lava pants, let me know how you do with them. If you just like to swim, let me know that too.

How to Improve Your Balance

Wanting to improve your balance is something we think about as we age. You always hear about the elderly not being able to balance, which leads to falls and clumsiness.

Before we talk about how to improve your balance, let’s first check your balance.

First thing to try is to lift one foot and see how long you can stand on the other foot. Time yourself. I suggest you test yourself balancing on both legs. My right leg is significantly stronger than the left so my balance is better on my right.

Second thing to try is checking your balance as you move. Try walking in a single line, as if you’re on a tightrope, for 10 or 12 steps. See how you do.

Once you start working on improving your balance, you probably want to repeat these tests so you can see how you’re improving.

How to Improve Your Balance

Here are a few things you can try to improve your balance.

  1. Practice standing on one leg. Be sure to alternate legs so balance improves on both sides. You may need a chair or counter to hold onto when you first start this. I often try standing on one leg when I do things like brush my teeth. I don’t know why I feel compelled to multi-task in this way but it’s a good way to practice standing on one leg.
  2. Practice standing from a chair without using your hands. Use a basic kitchen chair for this. (Don’t use your rolling desk chair!) Just put both feet on the floor and stand. You’ll probably feel this in your thighs. Do this a few times in a row. If you’re good at this and able to do it successfully, make it harder by standing up from the chair using only one leg. Again, don’t use your hands. Just get up using one leg. It’s a challenge!
  3. Walk heel to toe in a straight line. You want to be sure to place one foot directly in front of the other so that the heel of the front foot touches the toes of the back foot. Be sure to keep yourself upright. You don’t want to slouch forward while doing this.
  4. Stand on one leg and bend and hold the other leg behind you. We do this often at gym classes at the end of class to stretch the quads. You may need to hold onto a chair or wall when you do this. I find it challenging to do it without a wall nearby.
    Improve Your Balance
  5. Begin a yoga or tai chi practice. Both of these provide significant help with balance.


Important!

Don’t forget to use your core. Any time you’re trying to balance, be sure to tighten your core. Keeping your central body strong helps keep your body more stable.

These are some simple things you can do at home to improve your balance. Let me know if you try any of these and if they help.

Roasted Pumpkin Seeds in the Air Fryer

It’s that time of year again when we grab some pumpkins and carve them into jack o’lanterns. We had a little pumpkin carving party at my house recently. You can see the results of our handiwork in the photos above and below.

We carved four pumpkins and I took all of the seeds to roast.  I basically followed the recipe I posted a few years ago about roasting squash seeds but decided to try using the Air Fryer instead of the oven.

I will say that making roasted pumpkin seeds in the air fryer worked well. The seeds turned out well.

First, I washed the seeds to get the goopy pumpkin strings off of them and then I boiled them for a few minutes.

I then poured the seeds into a colander and then into a towel to dry them.

I put the seeds into a bowl and coated them with about a tablespoon of avocado oil and some sea salt. You can use whatever oil you want on the seeds. Some people coat the seeds in melted butter which probably gives them a richer flavor. I was worried that seeds cooked in butter wouldn’t last as long as ones cooked in oil so I stuck with the avocado oil.

I then cooked them in the air fryer for about 10 minutes at 375°, shaking them at about the halfway point.

The air fryer worked well. It was very easy and didn’t take long. I think roasting in the oven is a longer process. The only problem with the air fryer was that the seeds fell through the base into the bottom of the pot. They were fine, despite falling, but it seemed a bit odd. I guess since the seeds didn’t really cook on the base, I could have just covered it with some foil or parchment paper.

Because I cooked the seeds from four pumpkins, I had a lot of them. So, I ended up roasting the seeds in two batches.

Recipe for Roasted Pumpkin Seeds in the Air Fryer

Raw pumpkin seeds, as many as you have.

Oil (Olive oil, avocado oil, even melted butter. Use your preferred oil.)

Salt

Any other spices you want to use.

Wash the seeds in running water. You can let them soak for a while first to loosen the pumpkin strings and glop.

Bring a medium pot of water to a boil and add the seeds.

Simmer for about five minutes.

Drain the seeds and then dry them by wrapping in a clean dish towel or paper towels.

Put into a small bowl and mix with the oil, salt, and any spices you like.

Put into the air fryer and cook at 375.

Cook for about 10 minutes or until the seeds have reached a crunchy, roasted state.

Shake the seeds around about half way through the roasting.

That’s it! A batch of crunchy roasted pumpkin seeds, full of vitamins, fiber, and tasty goodness.

Roasted Pumpkin Seeds in the Air Fryer

Struggling to be Fit and Strong

I’ve been struggling lately with living my fit, strong life. I’m having a hard time getting myself to the gym or out for anything more strenuous than walking Penny. I’m also not eating as well as I would like. I know this is just a mental block on my part but I’m having a hard time getting over it.

I thought perhaps if I wrote about it here, it would help. You know, share my misery and see if that helps. Sometimes sharing the things you struggle with really helps relieve some of the struggle.

I’ve allowed sweets to come back into my life. I was doing so well with not eating sugar but suddenly I’m back to eating baked goods. I slipped in some ice cream but it made me feel so sick that it was easier to remove that from my life.

Being around people who eat in a healthy way makes it easier for me but since I no longer spend much time around people, that support has disappeared.

I also struggle with having a schedule because I’m able to create my own schedule. I really don’t manage to do that so my eating has become erratic.

I’m not complaining because I know I could make some simple changes and things would get better, even if only a little bit.

Perhaps if I make one or two small commitments to myself, I’d get back on track.

The problem is that if I’m not exercising and eating well, my moods plummet. If I’m feeling down or anxious, it becomes difficult to exercise and eat well. You know, a Catch 22 sort of thing.

If you have any advice for me, I’d love to hear it. I know we all struggle with things at different times but right now I’m struggling to be fit and strong.

Curry Popcorn Recipe

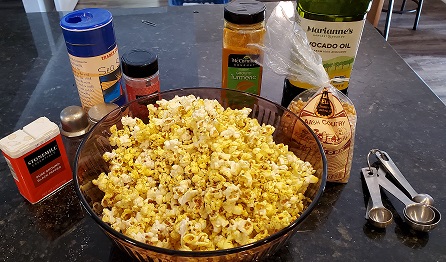
A friend made me this curry popcorn one year for my birthday. I thought it was the best snack food I’d had in a long time so I asked her for the recipe. She made a copy for me and I made it several times.

Then, as life happens, I moved and boxed everything up and didn’t unpack things as well as I packed. I was looking for this recipe and couldn’t find it. Recently I opened a box I’d stored in the closet in my office and there was the recipe for curry popcorn. I got the munchies just thinking about this popcorn.

The funny thing is that I wrote a lengthy list of healthy snacks in an earlier blog post but I didn’t mention popcorn at all. It must have been in one of my phases of avoiding grains.

This popcorn is no harder to make than regular popcorn. The advantage to it is that it’s got a lot of flavor so you don’t need to douse it in melted butter. Not that I don’t love buttered popcorn but it’s not the best snack for you.

This recipe calls for making the popcorn on the stove, which, of course, requires you to use some oil. I’m not sure that you could make this with popcorn popped in the microwave. I mean plain popcorn popped in a microwave popper, not the bags of microwave popcorn. Of course you can’t doctor the bags of popcorn. I often make popcorn in the microwave because it doesn’t require any oil. It’s like air popcorn.

What oil to use?

The ingredient list says oil of choice. The original recipe just called for vegetable oil but I used coconut oil in this many times and it works great. The popcorn also tastes great when popped in coconut oil.  My current batch was made with avocado oil because that’s what I had. It also worked well.

What popcorn to use?

You can use any regular popcorn that you can pop. I usually buy organic popcorn (Trader Joe’s carries this) or I buy Amish popcorn. I like to buy non-GMO popcorn but that’s a personal preference. I used to buy a tub of popping corn from the Boy Scouts but I no longer know any scouts selling popcorn.

Curry Popcorn

This popcorn is even better the second day, after making it the day before.

Ingredients

  • 1 tsp cumin, ground
  • ½ tsp red pepper flakes
  • 1 tsp black pepper
  • ½ tsp turmeric
  • 1 tsp salt
  • ¼ cup oil of choice
  • ½ cup unpopped popcorn

Directions

Mix the spices together.

Curry Popcorn

Heat oil in a large pot with a lid. Add one or two kernels. When the kernels pop, add the rest of the popcorn. When those kernels are getting ready to start popping, add the spices.

Curry Popcorn

Shake the pan continuously until the popcorn quits popping.

Pour into a bowl and enjoy.

Curry Popcorn

Important Note:

  • Do NOT breath in the fumes of the heating spices and do NOT put your face over the pot.
  • Use a sealed lidded pot if possible, one without a vent.

Storage

This does make a lot so if you’re going to not eat this in one sitting, you can store it in a large plastic bag or a bowl with a lid. If it doesn’t get moist, it will last for a few days.

Variations

Stir in two minced garlic cloves

Use a different spice combination. Mix together:

  • ½ tsp cumin
  • ½ tsp coriander
  • ½ tsp paprika
  • ¼ tsp cayenne

Or try a spice combination of your own creation. I wonder how a pumpkin pie spice blend would work.

I think this popcorn makes a great snack. It’s flavorful and not covered in butter. Let me know if you try it and what you think.

Strength Training Guidelines

We’ve talked a lot about strength training guidelines for adults on our podcast. I thought I’d provide a quick recap of those guidelines and give you some ideas on how to get in quality strength workouts.

Strength Training Guidelines

According to the American College of Sports Medicine (ACSM), healthy adults should perform strength training at least twice a week on non-consecutive days. Each session should include 8 to 10 repetitions that stress each of the major muscle groups or 10 to 15 repetitions for those who are older and frail.

If you go with longer repetitions, you’ll use lighter weight.

You can certainly train more than twice a week but you want to make sure you cover all of the major muscle groups at least twice a week. So, perhaps you do upper body and alternate with lower body twice a week. That gives you four days of strength workouts.

Major Muscle Groups

If we’re supposed to train every major muscle group twice a week, we need to know what they are. Plan on training these parts of the body:

  • Chest
  • Back
  • Shoulders
  • Arms:
    • Biceps
    • Triceps
  • Abdomen
  • Legs:
    • Quads
    • Hamstrings

Benefits of Strength Training

Why should we strength train at all? Isn’t it sufficient to just walk 10,000 steps every day?

The ACSM describes a variety of benefits of strength training. They are:

  • Maintain muscle or fight the loss of muscle mass
  • Prevent osteoporosis
  • Decrease the risk of heart disease
  • Decrease the risk of falls or the likelihood of injury if you do fall
  • Increase quality of life

Examples of Strength Training

You often hear strength training also referred to as resistance training. The goal is to put your muscles under tension using resistance. You can do that with weights like dumb bells and kettle bells, resistance bands, machines at the gym, or body weight exercises.

Examples of typical resistance exercises that can be performed using free-weights, machines, or body weight for the major muscle groups are:

  Free-Weight Machine-Based Body Weight
Chest Supine Bench Press Seated Chest Press Push-ups
Back Bent-over Barbell Rows Lat Pulldown Supermans
Shoulders Dumbbell Lateral Raise Shoulder Press Arm Circles
Biceps Dumbbell Curls Cable Curls Side planks
Triceps Dumbbell Kickbacks Press downs Dips
Abdomen Weighted Crunches “Abs” Machine Crunches Prone Planks
Quadriceps Back Squats Leg Extension Body Weight Lunges
Hamstrings Stiff-leg Deadlifts Leg Curls Hip-ups


If you aren’t sure how to do any of these, there are lots of demonstrations available on YouTube and a variety of strength training apps.

Don’t forget that the ACSM also recommends that you get in some cardio workouts during the week. I’ll write that up in a future post.

Differences Between Dynamic and Static Stretching

In our podcast episode with Carol Simpson, she talks about dynamic and static stretching. She commented that you often see runners at the beginning of a race doing static stretches when they should be doing dynamic stretches.

Shortly after that episode, I went to my gym and they had a flyer out entitled Flexibility Guidelines for Seniors. I really hate applying guidelines for seniors to me but there was some useful information, mainly describing the differences between dynamic and static stretching.

Dynamic Stretches

Dynamic stretches involve movement. You move your joints and muscles so they go through a full range of motion. These stretches should be done before a workout to warm up the muscles.

Sometimes dynamic stretches are movements that mimic the movement of the exercise. That’s why you see swimmers circling their arms before a swim or golfers imitating a golf stroke without the club.

Dynamic stretches are about movement and the stretches are not held for any length of time.

Some examples of dynamic stretches are:

  • Hamstring sweeps
  • Arm circles
  • High knees
  • Jumping jacks
  • Side shuffles

Because the function of dynamic stretches is to warm the muscles, these are not the stretches to do after a workout. That’s when you want to use static stretching.

Static Stretches

Static stretches are when you stretch a muscle to its furthest point. You hold this position for a period of time. You might hold a stretch anywhere from 10 seconds to 60 seconds.

Static stretches are usually performed after a workout when your muscles have been warmed up. These stretches help to stretch out those worked muscles.

Some examples of static stretches are:

  • Toe Touches
  • Knee to chest
  • T-spine rotation

Basically, name a body part and stretch it. You can do a neck stretch, a triceps stretch, a quads stretch. Any of these things help the worked muscles. The static stretches help you recover from your workouts.

Let me know what stretching you like to do.

Hydration Guidelines

I found some hydration guidelines at my gym and I thought I’d share some of the information.

How Much Water Should I Drink?

You’ll see a wide variety of numbers for water requirements for healthy adults.  When I searched for hydration guidelines for adults and found a range of recommendations.

I saw that we should drink eight 8-ounce (just shy of two liters) glasses of water per day. I saw higher and lower numbers too.

You can find calculators online that will take your weight and tell you how much water you need to consume. I found one that seemed to be hosted by some diet blogger. It said I should drink 119 ounces of water per day, which is the same as 14.9 Cups or 3.53 Liters). That seems excessive.

I’m not going to recommend a particular number but I know that I don’t drink as much water as I should. I think if you started with the 64 ounces (eight 8-cups), you’d figure out if you need more or less.

It is possible to drink too much water so don’t get carried away with your water consumption.

Benefits of Drinking Enough Water

Why should we care about how much water we consume each day? What’s the big deal?

Here’s a list of benefits that Harvard Health Publishing put out:

  • carrying nutrients and oxygen to your cells
  • flushing bacteria from your bladder
  • aiding digestion
  • preventing constipation
  • normalizing blood pressure
  • cushioning joints
  • protecting organs and tissues
  • regulating body temperature
  • maintaining electrolyte (sodium) balance

I can think of a couple of more benefits. Drinking water helps make your skin look better.

I’ve also read that drinking water can help you to lose weight.

Signs of Dehydration

The most obvious sign of dehydration is that you’re thirsty. Sometimes though, we don’t have enough fluids in our bodies and we aren’t necessarily aware of it.

Here are some signs:

  • Dry mouth and tongue
  • Irritability
  • Dark urine
  • Fatigue
  • Dry skin

I just want to point out the irritability sign. Sometimes we are dehydrated, we get cranky. But sometimes when we have eaten, we get cranky. You might try drinking a glass of water before you reach for a snack.

How to Drink More Water

Now that we’ve discussed hydration guidelines and how to tell if you’re dehydrated, lets talk about how we can increase how much we drink.

Add pieces of fruit to your water. There’s the traditional lemon slice, which I like, but you can add other fruits as well. Other citrus fruits work well, as do strawberries and perhaps other berries too.

Drink water as part of your routine. Perhaps you start every day with a glass of water. Or every time you eat a meal, you also drink some water. Make water part of your daily habits.

Replace carbonated and sugary drinks with water. I suggest getting some sparkling water as a replacement. I bough a case of Perrier at Costco and I actually consider that water to be a treat, especially when I pour it into a goblet or wine glass.

Get a water bottle that tracks your progress. I’ve seen some very large water bottles out there.

Here’s something I’ve used to track my water and to be honest, I think that it was Chris who gave me this idea. I noted the size of my water bottle and then decided how many times I would need to refill it to reach my goal. If, for example, I need to refill it four times per day, I put four rubber bands around the bottle. When I filled it, I removed a rubber band. If I removed all four rubber bands, I knew that I had drunk my water for the day.

Don’t forget that some foods have a lot of water in them. Watermelon is probably the most obvious one but most fruits have a lot of water in them. Some vegetables, for example, cucumbers, are a good source of water. Also, if you drink milk, there’s water in it.

Hydration Guidelines when Exercising

I try to always have a bottle of water with me when I exercise. If nothing else, taking a drink gives me a break when I’m working out hard.

Exercise increases our need for water. Here are the American Council on Exercise (ACE) recommendations:

  • Drink 17 to 20 ounces (about half a liter) of water two to four hours prior to exercising.
  • Drink 8 ounces (about a quarter liter) of water about a half hour before exercising.
  • Drink 7-10 ounces (about a quarter liter) of water every 10 to 20 minutes during exercise.
  • Drink 8 ounces of water no more than 30 minutes after exercising.

Conclusion

It’s helpful to know how much water you’re drinking and have a sense of how much water you want to be drinking.

How much water do you drink each day? Do you have any suggestions I didn’t list here? Let me know in the comments below.

Dressing for the Gym

The topic of dressing for the gym comes up occasionally. I went into the locker room at my gym yesterday and a woman I know from the locker room was there. She was wearing a cute outfit for working out. She had on a black skort, you know, the short skirt that has shorts underneath. Her top was a cute short sleeved black and white striped jersey. A very attractive outfit.

I commented on it. I told her how nice she looked. She said, “I’m worried that I’m showing too much skin.” I told her I thought she was fine.

She said a friend of hers who always looks polished told her that the key to looking good as you age is to cover up as much as possible.

I said that might be but she looked fine in the outfit. I said you should wear what you want to wear and it doesn’t matter what others think. Also, most people won’t be paying attention to how she looks anyway. And if anyone does pay attention and they don’t like how she looks, that’s their problem.

I get it though. I look at myself in the mirror when I’m getting ready to go to the gym. Is this T-shirt tight enough for me to work out without the shirt billowing out? Is it also loose enough that it disguises my belly? Or at least does it make me think it serves as a disguise?

I talked about what actually to wear to the gym in an earlier post. Gym clothes really aren’t difficult. We should dress for comfort and ease. It’s great if we also find something that we enjoy wearing.

Of course, we want to look good. We’re so aware of how our skin wrinkles and how the blotches from the sun are unattractive. We’re never thin enough or strong enough.

Anyway, Patty wore her outfit and I saw her working out. She looked great to me. She’s a 70-something year old woman who is in the gym doing push ups and biceps curls and whatever else is in her workout. That’s a great look in my opinion.

Obstacles on the Bike and Hike Trail

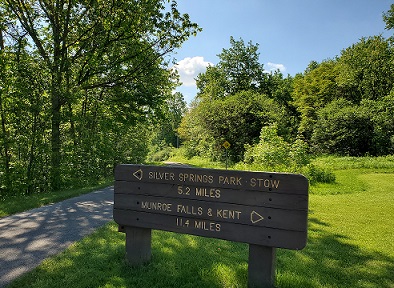
I discovered some obstacles on the bike and hike trail that’s close to my house. I’m lucky to live close to the park’s trail. I use it frequently all year round. This past weekend was a holiday weekend and we had gorgeous summer weather. I was not the only person eager to use the bike and hike trail.

On Saturday, I took Penny for a run on the bike and hike trail close to my house. It was a great day for a run, plus it’s a holiday weekend. There were lots of people using the trail.

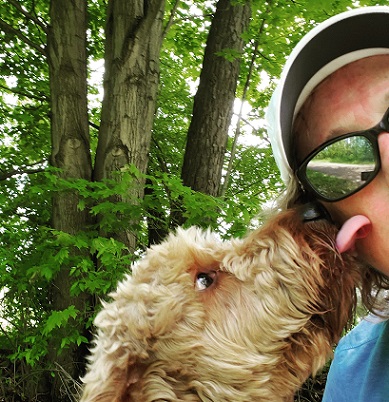
I know I’ve written about running with Penny before. Penny is doing well with running with me though I’m so slow that Penny doesn’t actually run. She just sort of trots along with me.  She has learned how to stick with me, though, so it’s easier to run with her.

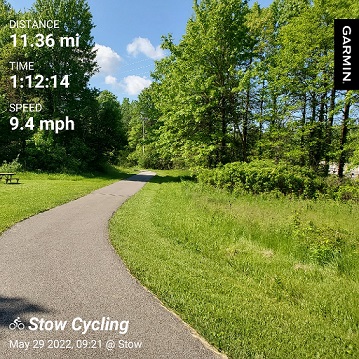
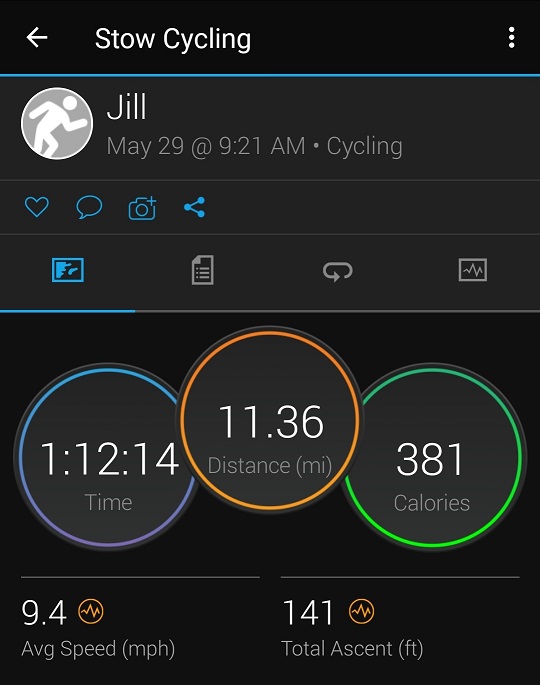
On Sunday, I got out my bike and went for a ride on the same trail. It was another gorgeous day and I rode for a little over an hour, which was the furthest I’ve ridden in a long time.

Obstacles on the Bike and Hike Trail

When I was running, here’s what I noticed. Many bikes zipped past me without saying anything. No “on your left” or even just “I’m passing you!” Several times I was startled by a bike that I was unaware was behind me.  I also encountered both groups of bikes and runners running two or three abreast. Each time I’d watch to make sure they moved over so I could continue my run. It felt like I was playing chicken with each group. Running with a dog makes it a bit more challenging. I try to make sure both of us are safe so I would usually make sure Penny was running alongside the trail. A couple of times we both had to get off the trail because there wasn’t enough room for us while people were passing.

When I was riding my bike, here’s what I noticed. A few people out walking and running had complete, over the ear headphones on so they couldn’t hear me say “on your left.” They couldn’t hear much of anything, I guess, except for whatever they were listening to with the headphones. I also noticed groups of bicyclists who were riding three abreast coming towards me. I wasn’t sure if they were going to move over in time.

Obstacles on the Bike and Hike Trail

There were two women walking their dogs on the trail. Both dogs were walking off leash and when I called out, “on your left” the women darted around trying to grab their dogs. I ended up having to stop and wait while they got their dogs back on their leashes. The women thanked me and were grateful that I stopped and waited. The trail seemed busy to be walking dogs off leash but fortunately no mishaps occurred.

For the most part, I think everyone was being careful to share the trail. The people wearing the over the ear headphones were probably the most at risk because I don’t think they knew who was approaching them. They seemed to be at the most risk for an accident.

We had such beautiful days over the weekend that I really wanted to enjoy running and riding on the trail, but it did remind me why I prefer using the trail on weekdays. I still enjoyed both days and will continue to use the trail, despite encountering obstacles on the bike and hike trail.

Do you encounter similar obstacles? Let me know.

« Older posts Newer posts »

© 2026

Theme by Anders Noren — Up ↑