Fit Strong Women Over 50.

Category: Veggie Challenge (Page 1 of 6)

Buddha Bowl

What is a Buddha Bowl? It usually includes a combination of both cooked and raw vegetables, whole grains, a source of protein and a sauce. Buddha Bowls were originally a vegan dish but if you’re not a purist, you can add some animal protein. I usually end up with chicken or some shrimp on mine.

The beauty of Buddha bowls lies in their flexibility—you can tailor them to fit your taste preferences, dietary needs, and what you have on hand. Whether you’re aiming for plant-based, low-carb, or just looking to increase your vegetable intake, there’s a Buddha bowl for you.

To build your own, start with a base like quinoa, brown rice, or leafy greens. Add colorful vegetables like roasted sweet potatoes, bell peppers, carrots, or cucumbers for a burst of flavor and nutrients. Next, include a protein source. For a plant-based option, try chickpeas, black beans, or tofu. If you prefer animal-based protein, grilled chicken or shrimp works well too. Finish it off with healthy fats like avocado, nuts, or seeds, and a drizzle of sauce—think tahini, hummus, or a light vinaigrette.

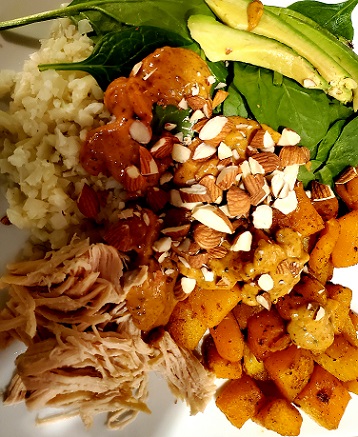
I have made Buddha bowls with a variety of ingredients. It comes down to what I have on hand. For one meal, I used cauliflower rice with roasted butternut squash and spinach. I added some shredded chicken breast and sliced avocado. I topped it with a sauce I had made and then sprinkled some chopped peanuts over it.

For another meal, I used some cooked quinoa, roasted sweet potato, raw spinach, chickpeas, a spicy almond butter sauce, and a sprinkling of roasted squash seeds.

One of the greatest things about Buddha bowls is that they make healthy eating feel satisfying and fun. They’re perfect for meal prep too. You can chop your veggies, cook your grains, and have everything ready in advance, making weekday lunches or dinners a breeze. Plus, there’s something so fulfilling about seeing a bowl full of nourishing, real food that’s ready to fuel you through your day.

If you’re looking for a fresh way to shake up your meals, give Buddha bowls a try. They just might become your new go-to!


Looking Back at Our Veggie Challenges

Chris recently posted about how eating more vegetables helps her maintain her weight and included some information about roasting zucchini. For some reason that made me think about some of our earlier posts about vegetables so I decided it was time for looking back at our veggie challenges.

If you enter Veggie Challenge in the search field, a lot of entries come up. Scrolling through the search results, I realized we have a lot of great ideas on how to get more vegetables onto our plates.

I found a recipe for a kohlrabi slaw that I made in 2019. Five years ago so I guess that’s why I forgot all about this dish but it sounds good. I need to make it again. It’s basically kohlrabi and apples chopped into matchstick sized pieces with a vinegar and oil dressing.

As I continued looking back at our veggie challenges, I found a post about making a watercress salad. The salad looks great and I remembered that a doctor recommended that I eat more watercress because I think it helped with digestive enzyme issues.

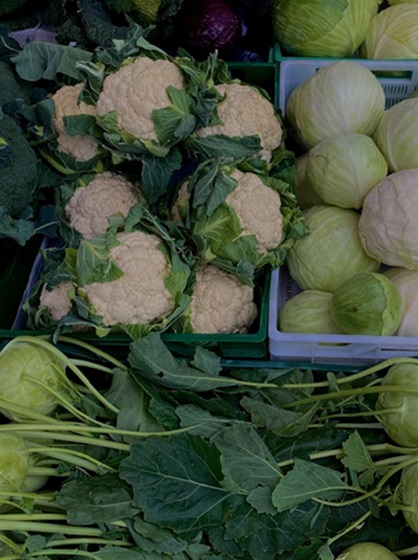
Chris and I are big fans of cabbage apparently because we’ve both posted plenty about it. Cabbage is a versatile vegetable so if you’re looking for ideas on using it, do a search on our website.

Besides maintaining weight, vegetables are good for getting fiber into our diets and provide a wide range of vitamins and minerals. For example, that watercress I mentioned includes calcium as well as plenty of other vitamins.

It was kind of fun looking back at our veggie challenges. This year (2024) we did a Eat the Rainbow challenge. Several of us struggled with getting all of the colors (curses, you blue/purple veggies!) I haven’t discussed it with Chris yet but perhaps we’ll repeat the Veggie Challenge in 2025. I’m sure we can all come up with even more creative ideas on getting in our vegetables.

Vegetable Soup for a Cold Weekend

Vegetable soup for a cold weekend seems like a natural for me.

It’s been very cold here in Northeast Ohio this weekend. So making various soups has been my go to response for eating. Here are some snapshots and recipes.

Super Quick Salsa Soup

Ingredients:

1 jar of mild or medium salsa
1/2 teaspoon garlic powder
1/2 teaspoon cilantro
2 cans black beans (rinse)
1 bag of frozen vegetables (thawed)
1 can corn undrained
3 cups chicken broth
2 cups shredded cooked chicken

Instructions:

  • Dump everything into a pot.
  • Bring just to a boil.
  • Reduce heat and simmer for about 10 minutes.

Top with shredded cheese, if you like. This is an easy way to get lots of vegetables and especially good if you have “put up” a lot of homemade salsa in the fall. The beans and chicken add protein and the heat in the salsa is enough of a kick for me.

Salsa Soup - Vegetable Soup for a Cold Weekend

Salsa Soup – Vegetable Soup for a Cold Weekend

I have been trying to get a variety of color in my meals by following the Eat The Rainbow challenge. Here is another soup that I ate but the colors are not rich and beautiful

Vegetable Soup with Chicken

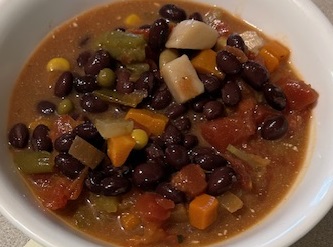
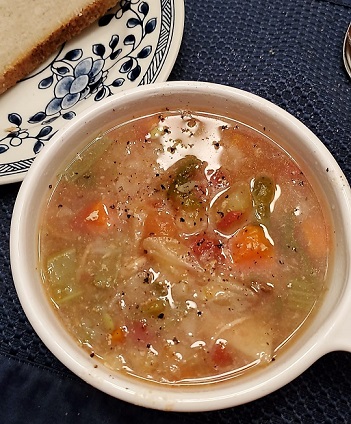
Last weekend I made a vegetable soup with chicken and added a can of kidney beans and black beans. My big mistake was not rinsing the black beans enough.

Vegetable soup with chicken breast  - Vegetable Soup for a Cold Weekend

Vegetable soup with chicken breast – Don’t forget to drain the black beans!

Without rinsing the beans, the broth and chicken, actually all the vegetables too, took on the hue of black beans. It all looked a little suspect and not very appealing.

It still tasted delicious.

Vegetable Soup with Shrimp – No broth

Shrimp and vegetables were also a great way to get a variety of color in my meal. I didn’t actually have a broth going so I shouldn’t call this soup… but it was really delicious too.

I got an air fryer for Christmas from my husband and I’ve been trying different food and meals in it. While the shrimp was cooking in air fryer, I defrosted the vegetables and did a quick stir fry to saute them.  So far, I really like cooking the shrimp on it. I missed having the broth, because that is one way I sneak extra water in my system without actually drinking water. I find it hard to drink enough water in the winter when it is cold, so drinking it as a broth really helps!

Shrimp cooked in the air fryer over vegetables. Soup without the broth!

What’s your favorite vegetable soup recipe? Please share it here in the comments or on any of our social media pages using Becoming Elli as the handle.

2024 Eat The Rainbow Challenge

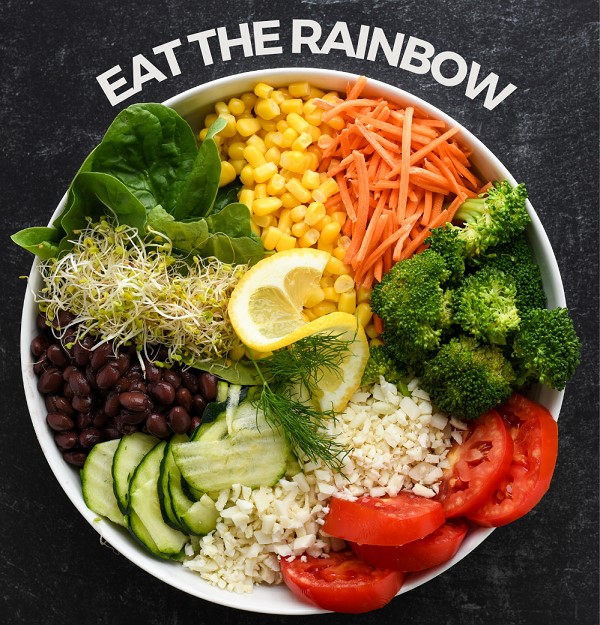
Eat The Rainbow is a new 2024 challenge for the Becoming Elli Community and the Fit Strong Women Over 50 podcast!

You can download the Eat The Rainbow checklist and information about why it’s important to Eat The Rainbow.

Eating the rainbow is an easy way to optimize your diet. Why is it important to EAT THE RAINBOW? Because colorful foods contain phytonutrients or plant compounds.

These compounds provide beneficial nutrients to us. They are found in plant foods like vegetables, fruits, nuts, seeds, legumes (beans), and whole grains.

Teas, herbs and spices also contain thousands of different phytonutrients.

Phytonutrients protect our health. Some phytonutrients help protect our cells from damage and some support the body’s natural detoxification processes. Others have anti-inflammatory or anticancer effects, or promote brain, heart, skin, eye, or liver health. Eating a wider variety of phytonutrients gives you a wider range of health benefits.

The color of plant foods comes from different phytonutrients. For example, red vegetables have different nutrients than green vegetables.

Typically, the darker the color, the higher the phytonutrient content. Once you get proficient at eating the rainbow, you might try to eat darker colors.

Try to eat 9 to 12 plants a day.  Remember that the rainbow includes fruits as well as vegetables but also includes nuts, seeds, beans, grains and spices.

Eating the rainbow means to try to eat at least one serving from each color group every day.

the more colors you can eat gives you a greater variety of phytonutrients.

One serving of vegetables is about ½ cup of cooked veggies or 1 cup of raw leafy greens; one serving of fruit is about ½ cup of fruit or one medium sized piece of fruit.

Lunch of Veggies with Protein

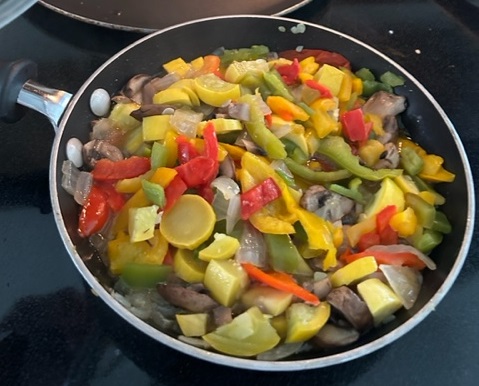
I had an awesome lunch over the weekend of veggies with protein. It was delicious. It seems like all the vegetables are becoming ripe and are really tasting especially good to me right now. Maybe it is just that time of year!

By this photo you might think I didn’t get enough protein ,but I added a couple of ingredients at the end of cooking and after I took this photo that really boosted the protein levels in my meal.

Here’s my recipe for these delicious veggies. No surprise, I sautéed them on the stove.

To prepare this meal, first I pulled out the cutting board and a sharp knife. Heated up the pan with some extra virgin olive oil.

Chopped and sliced the following veggies:

  • Onions
  • Peppers: red, orange, yellow, (forgot to get green peppers)
  • Yellow Squash
  • Celery
  • Mushrooms

The onions went into the heated olive oil first because it took them the longest to cook. I sautéd all the vegetables over medium heat and after it started really cooking, I added a little bit of water, then covered it and turned down the heat to low.

I put the mushrooms in very last because they so cook much faster.

Adding Protein
In order to get more protein I added some tofu and some feta cheese. Tofu has a lot of protein (9 grams of protein in a 3 oz piece.) And the feta cheese added some great flavor. I added a little salt and pepper to taste. This meal was really delicious. Tons of colorful vegetables, so I am “eating the rainbow” and getting lots of veggies. #veggiechallenge2032

These vegetables are are fairly typical, probably the only unusual ingredient was the tofu, which I don’t usually have on my shopping list.

Tofu takes on the flavor of the other foods and it didn’t take much for it to take on the flavor of the vegetables in olive oil. So if you’ve thought about trying tofu in your meals, this might be a good way to try it. I usually slit the top and drain it. There’s a lot of water in the carton.

I cut it like a checkerboard into probably 25 pieces, at least 16 pieces. And when storing it in the refrigerator, I place it in a gallon zip lock sandwich size baggie. It’s got a consistency that is thicker than yogurt or pudding, but similar texture. It’s probably not something to eat plain, just by itself unless you really love it.

Do you like tofu? How do you prepare it or add it to recipes? I’d love to learn new ways of eating it as I think it’s a really good protein for me.

Tomatillias – a New Vegetable for Me

We’ve been growing tomatillias in the garden!

A while back we had a veggie challenge and I find I am still adding new vegetables to my meals, especially in the summer.

I didn’t know a whole lot about tomatillias. They’ve been on the edge of my veggie list for a while. Maybe you aren’t familiar with them either. If you’ve ever had verde salsa, you’ve probably eaten tomatillias. That’s the green salsa. Until this summer, that’s been the extent of my knowledge about the tomatillia.

They are a vegetable fruit – basically a member of the nightshade family, like the tomato. (Other nightshade members are eggplant, peppers and . They often have a little elf cap on their stem.) When they grow, they’ve got a husk surrounding the fruit.

It’s been quite fun growing them in the garden, because they are little different.

tomatillia

Some of the husk layers on this plant have turned purple-ish which reminds me that this is a cousin of the eggplant.

The plants like to grow leggy like tomato plants, so staking them or using tomato cages tends to help the plants from drooping and the fruit laying on the ground.

tomatillia

Each tomatillia is covered with a thin skin layer, a husk. It didn’t remind me of corn because there isn’t any silk.

You know when they are ripe because the fruit inside the skin is as large as the skin. Usually the husk begins to darken as well. There are different varieties. We have the green tomatillias but I understand that there are some that are purpleish also.

Tomatillias under the skin

You can see the fruit of this vegetable underneath of the husk. The husk should be more tan, so this one isn’t quite ripe.

One of my favorite ways to eat them are chopped up and tossed in a salad like the photo below, with tomatoes, cucumbers, chopped onion and avocado. I’ve enjoyed this veggie salad with tomatillias several times this summer.tomatillias salad

Besides eating them in a salsa or salad, I understant that the tomatillia is great in a chilim too.

Here’s one of my favorite salsa recipes:

I chop up the veggies and throw them into the vita mix. If you don’t have a vita mix, then you may want to continue chopping until the pieces are very small, like diced or minced.

Chop up:

  • 3 large tomatoes
  • 3 medium green peppers
  • 1 medium onion
  • 3 medium tomatillias
  • fresh cilantro
  • parsley

Add to this:

  • small clove of garlic
  • add a little salt
  • dash of lime juice

Put into your Vitamix or blender and pulse it until it gets to the consistency you like. Serve!

Do you enjoy tomatillios? How do you prepare them. Leave a comment below or send an email to Chris@becomingelli.com. Thanks!

#VeggieChallenge

My Roasting Eggplant in the Air Fryer Experiment

If you Google how to roast eggplant in the air fryer, you will discover a lot of recipes. Trust me on that. I found lots of different recipes for roasting eggplant, even when I limited my search to using the Air Fryer.

I asked in the Becoming Elli Facebook Group (join us there if you haven’t already!) if anyone had any good ideas on what to do with eggplant. People made many suggestions so I have ways to prepare eggplant for a while. I also checked for other eggplant recipes in this site and found one recipe that Chris posted. It sounds good too so I may add that to my list of ways to prepare eggplant.

Roasted eggplant was one of the more popular suggestions so I decided to give that  a try. I love most roasted vegetables so I thought roasted eggplant would probably also be good.

Once I started researching the best way to roast eggplant, I found the one dividing point between cooks.  Salting the vegetable before cooking or not.

Eggplant has a lot of moisture in it. Typically if you’re making eggplant parmesan or some other Italian eggplant treat, you’re instructed to salt the slices of eggplant to draw out the moisture.

Some of the recipes for roasting eggplant insist the only way to get crips eggplant is to salt it first and remove the moisture. Other recipes said it doesn’t matter and you can skip that step.

The other discrepancy between the roasting methods was about removing the skin first. Some recipes said to peel the eggplant before cooking and other recipes said to keep it on.

To Salt or Not to Salt

I decided to try both methods of roasting. I cut one eggplant into cubes and cooked half at a time.

To make sure I was conducting a fair experiment, I kept everything the same with both batches. I used the same oil and the same spices for both batches. However, I sprinkled salt on one batch and let it sit for about 30 minutes. The second batch I roasted without bothering with the salt.

I decided to leave the skin on the eggplant because my inclination with all vegetables is to leave the skin on if possible. For one thing, it’s a lot easier not to peel a vegetable before cooking. Secondly, it seems that for most vegetables, there’s more vitamins and fiber if you keep the skin on the vegetable.

Easier and better for you? Let’s try keeping the skin on the eggplant.

Roasting the Batches

For each batch of eggplant, I used about a tablespoon of avocado oil and then sprinkled on a mixture of spices. I used pepper, garlic powder, oregano, and a pinch of red pepper. Because I knew one batch would already be salted, I did not add salt to the spice mixture.

I roasted the first batch (the unsalted one) in the air fryer at 400 for about 15 minutes. I shook them up a couple of times while cooking. When they came out, the pieces were very dark so I thought I had burnt them. It turned out that they were fine but just had a dark color.

The second batch sat in a colander with the salt on for about thirty minutes. I stirred them occasionally to help remove any moisture. When I was ready to roast them, I wiped the salt and moisture off the eggplant chunks, and then prepared in the same way as the first batch.

I did cook the second batch for a couple of minutes less than the first batch. I thought I had burnt the first batch so wanted to try for a slightly shorter time.

Results

By the time the second batch had finished cooking, I had eaten most of the first batch. I forced myself to leave some so that I’d have them when the second batch finished. You can see in this photo how much I ate in the 12 minutes the second batch cooked. (The second batch is on the left. I know, they should have been on the right.)

The second batch was also good but did have a saltier flavor than the first batch. I was glad that I had not put any salt in the spice mixture.

I did not notice any difference in the crunchiness of the eggplant. Based on this small experiment, I would say you can safely skip the salting and wiping off part of the process.

And what about the skin?

The roasted eggplant became very soft so the only real crunch was from the skin. I really liked it. I thought the roasted skin added some great texture to the dish.

The result was that I ate an entire eggplant as a snack in the middle of the afternoon. It was delicious.

Roasting Eggplant in the Air Fryer

So here’s the simple recipe I used for the eggplant.

Ingredients

Eggplant

Oil

Spice Mixture. Use what you want for this but I used about 1 teaspoon each of oregano and garlic powder, ½ teaspoon of black pepper, and a scant 1/8 teaspoon of cayenne pepper.

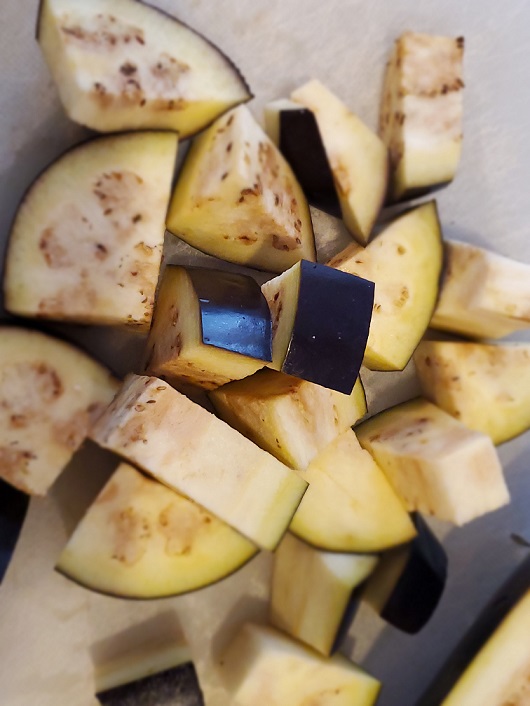
Cut the eggplant into about one-inch cubes.

Toss them in about a tablespoon of oil. I used avocado oil but olive oil would work well.

Mix the spices together and then toss with the eggplant cubes.

Add the eggplant to the air fryer.

Roast at 400 for about 12 minutes. Stir at least once, halfway through the cooking.

These were good hot, right out of the air fryer, warm, and at room temperature.

They weren’t around long enough for me to try them on salad or any other dish.

I’m still open to other ideas for eggplant but I absolutely loved the roasted eggplant.

If you have any suggestions about roasting eggplant in the Air Fryer, other ways to cook eggplant or roasting other type of vegetables for me, be sure to share them with me.

Spicing Up My Bland Vegetable Soup

I made a pot of vegetable soup the other day using my Instant Pot. My son and daughter-in-law were coming to visit and I wanted to have soup since it was one of the first cooler days of fall. I was rushed and just sort of threw the soup together. It wasn’t bad but it was rather bland. It definitely needed some spicing up.

Here’s how I made the soup. I used:

  • Onions
  • Carrots
  • Celery
  • Cabbage
  • Potatoes
  • Chicken
  • Can of diced tomatoes
  • Chicken broth

Because I was rushed, I didn’t sauté any of the vegetables before adding the other ingredients. I decided it didn’t really matter.  The Instant Pot was full, almost overly so. I cooked the soup and served it up right away when my guests arrived.

I shouldn’t have been surprised but the soup was bland. It wasn’t bad but it sure wasn’t the best soup I’ve ever made.

Ideas for Spicing Up My Bland Vegetable Soup

I asked for advice on the Becoming Elli Facebook Group on spicing up my bland vegetable soup. Here’s the list of suggestions I received.

RustySue said to try Sriracha. That would add some kick, for sure.

Souza recommended adding carmelized onions. I wouldn’t have thought of that. I definitely wouldn’t have had the patience for this batch of soup but it’s great advice for a later batch.

Janet said she uses a veggie juice like V8 as the broth in place of water. I remember using V8 in the past but had forgotten about it. It’s a good way to add some flavor to the soup.

A couple of spoons of basil pesto was suggested by Karen. I would never have thought of that but it would be a nice addition.

Sherry had a suggestion that I could use on the bowl of soup. She said, “top it with some garlic bread croutons and feta cheese!” I think this would have been a great addition to my soup.

Spice Recommendations

Beth recommended adding bay leaf or cumin. I had both of those in my spice cabinet. That would have worked.

Lisa suggested garlic and lots of salt.  I didn’t have garlic cloves but could have used garlic powder. I definitely under-salted the soup.  Lisa said she’s learned that salting more heavily really brings out the flavors in food.

A little tomato sauce, garlic, salt, and bay leaves while cooking was Patty’s recommendation.

Barbara said, “I add a beef billion cube, oregano, basil and garlic.” That would definitely spice up the soup. The bullion usually adds a lot of sodium so you get a lot of salty flavor.

“Six pepper, sparingly”, Laureen said. She added, “It adds flavor, a little heat.”  I did not know this spice blend so I had to look it up. It’s a spice blend made up of a mix of black and white pepper, red and green bell peppers, plus chili peppers. I suspect this would be a fantastic way for spicing up bland vegetable soup.

A suggestion made by MiMi was to add curry. This is a great reminder that I have a cabinet full of spices and that I could simply rummage around in it and find some easy ways to spice up any dish I’m making.

Bobbie’s answer was turmeric and cayenne pepper. For a while I was a big turmeric fan. I added it to a lot of things but then got out of the habit. I do like to use cayenne pepper too.

Start at the Beginning

Kathy provided a detailed response:

I always find it difficult to season a soup after it’s been made, I usually try to add no sodium type flavors in the very beginning – you might try beginning with a bit of olive oil in the pan and adding just a few red pepper flakes, let cook a minute, then add onions until translucent, during this time, add pepper, paprika, a bit of garlic powder and if you want to kick it up a bit, cayenne pepper, or cumin depending on the flavor profile you like, cook for a minute or so, then begin to make your soup, see if this helps.

I think that is good advice.

Nourishing Slow Cooked Vegetable Soup

Sue passed on a link from the Women Living Well after 50 website for a great sounding vegetable soup. I like the recipe and thought adding ginger was a fantastic idea.

Conclusion

After reading everyone’s suggestions, I’m now much more prepared to make a zestier vegetable soup. Also, I realized that our private Facebook Group is a great source of ideas. I just bought some greens and can’t decide what to do with them so I guess I should go to the Becoming Elli Facebook group and ask for advice.

Do you have any suggestions for spicing up my bland vegetable soup?

Salmon and Sardine Patties Recipe

I love salmon patties. They’re quick and easy and taste great. I was trying to figure out how to get more sardines into my diet. I had a number of cans of sardines in my pantry so it made sense to use them but also sardines are supposed to be good for you. Sure, salmon is too but I find it harder to work sardines into my eating patterns. I’ve written about this before so I guess it’s an ongoing challenge for me. This time I wanted something warm for dinner, not a sardine salad so I came up with the idea of salmon and sardine patties.

Because we’re doing the 2021 Veggie Challenge, I wanted to be sure to add some vegetables to this. Normally I would have used only onion but this time I used diced onion, celery and red peppers. I also added ground flax seeds because flax seeds are rich in fiber, nutrients, and omega 3 fats. I often look for ways to get flax seeds into my diet.

Salmon and sardine patties

Ingredients

1 can salmon (6 oz.)
1 can sardines
2 eggs, whisked
1/4 cup diced onion
1/4 cup celery
1/4 cup red pepper (You can add more vegetables or remove some of these.)
1 tablespoon Dijon Mustard
1 tsp Garlic powder
1 tablespoon ground flax seed
Salt
Pepper
Avocado oil or olive oil or oil of your choice
Spinach
Lemon slices

Directions

Salmon and sardine patties

Prepare patties:

Drain both cans of fish and fork into a small mixing bowl.

Add eggs and mix.

Blend in the diced vegetables, mustard, garlic powder, flax seed, salt and pepper.

Mix well and then form patties.

Refrigerate patties for half an hour or longer.

When ready to cook the patties, heat oil in cast iron skillet or non-stick skillet.

Add the patties to the pan.

Cook patties for several minutes until browned and then flip and brown on the other side.

Salmon and sardine patties

Serve on bed of spinach or other greens with slices of lemon.

A side salad or other vegetable completes the meal.

I think you’ll find this to be a delicious, easy dinner to make. It’s versatile and tastes good. You can add or delete as many vegetables as you want.

Beyond Burger Review

I tried a new to me kind of veggie burger this week called Beyond Burger. Does this count as part of the veggie challenge? I’m not sure, because this sure felt like cheating!

Just to clarify, I am a meat eater but want to have something on hand when vegetarian family members are here for lunch. I’ve tried Boca Burgers and like the original version… and have had MorningStar but haven’t liked the taste of those. My husband picked these up at Costco.

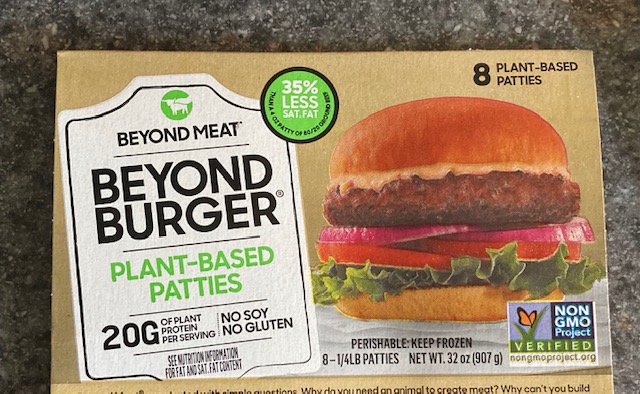
The Beyond Burger is a frozen patty, packaged two to a container. I took mine from the freezer and defrosted it in the microwave. The red juices looked suspicious to me until I double checked the ingredients where I saw beet juice. That explained it.
ingredients and nutrition of beyond burger

I think if I did the entire burger thing with a bun, lettuce, tomato, pickle and condiments, it could almost pass as real beef. However in this taste test, I just had it as a patty, so I could focus on the flavor.beyond burger patty

On a scale of 1-10, I’d say that I’d give it a 6 as just a patty. Not too bad. The consistency didn’t tempt me to break it up to use it like crumbled ground beef to use in a recipe, which was my first intention.

Also I found that it needed to be cooked low and slow, so it wouldn’t burn. cooking the beyond burger
Maybe I should have added some olive oil to the pan to begin with, because the outside tended to get too cooked without doing the the middle, when I cooked it at my usual burger stove top setting of 7 on my cook stove. End result, the first part was cooked as a 7 and after I flipped it, I reset the temperature to a four and put on the lid to help heat the insides as well.

Next time, I may go wild and actually break it up to use in a recipe as pretend ground beef in chili or my inside out egg rolls with broccoli slaw.

Have you ever tried Beyond Burgers? How did you fix it and did you love it?

« Older posts

© 2026 Becoming Elli

Theme by Anders NorenUp ↑