Category: Recipes (Page 6 of 8)

Flourless Chocolate Cake

Flourless chocolate cake? Really?

There are times when you need a dessert or to be more specific, there are times when you need chocolate cake. January is a big birthday month in  my family (my brother and I are two days apart, birthday wise) and of course February brings Valentine’s Day. This is a good cake for a sweetie who is trying to avoid flour and added sugar.  I don’t think this falls completely into the healthy eating camp but it’s a good try.

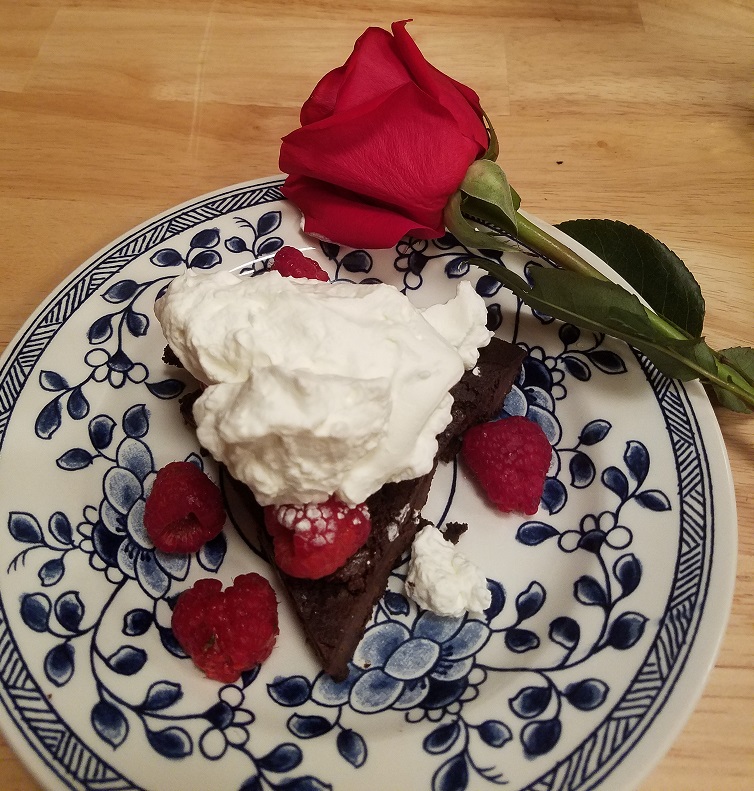
I try to avoid sugar and often I avoid wheat. So trying to find a cake recipe can be tough. Here’s something I make when I need something that feels a bit celebratory. It’s easy and tasty and looks great.  The berries and whipped cream on top of the dark chocolate is lovely.

Flourless Chocolate Cake

Because this is flourless, it’s a very moist cake. It’s almost brownie like. Also, because there’s no added sugar, it’s not particularly sweet. You can certainly add a bit of sugar to sweeten it up. If the important thing to you is that it’s flourless, maybe you don’t mind sneaking in a bit of sugar.

This cake has no rising agents (baking soda, baking powder, etc.) so it doesn’t really rise. If you use too large a pan, you’ll have a very flat cake.

Flourless Chocolate Cake

This recipe is based on a recipe I found on detoxinista.com.

Ingredients

6 oz. dark chocolate bar (70 to 85% dark chocolate, depending on what you have on hand. I often use the big block of dark chocolate from Trader Joe’s.)

3 whole eggs and 1 or 2 egg whites (you can just add in one more whole egg if you prefer and omit the egg whites)

½ cup grass-fed butter

1/3 cup cocoa powder

1 tsp pure vanilla extract

Heavy whipping cream

Berries

Directions

  1. Preheat the oven to 350. Line a springform pan or a cake pan with parchment paper. If you don’t have any, grease the pan thoroughly with coconut oil or butter.
  2. Melt the chocolate and butter together. You can use the microwave or a double boiler for this. I just throw it in an oven proof bowl and melt in the oven as it’s pre-heating.
  3. Mix the melted chocolate with the eggs and cocoa. Stir well. Add in the vanilla extract.
  4. Pour the batter into the prepared pan.
  5. Bake for 20 to 25 minutes or until the center looks cooked. You can check for doneness with a toothpick.
  6. Remove from oven and let cook for about 15 minutes. Remove from pan and let cool completely. If you used a spring-form pan, removing the cake is easy. When using a cake pan, you can lift the cake from the pan using the parchment paper. If you greased the cake pan, remove the cake by flipping it or let it cool in the pan and then serve it from there.
    F;ourless Chocolate Cake
  7. When ready to serve the cake, beat the heavy whipping cream until firm peaks form.
  8. Wash and prepare the berries (if you’re using strawberries, slice them)
  9. Put a slice of cake on a plate and top it with some berries and whipped cream.


Recipe Note

If this cake is not sweet enough for you, add some sweetener to it. You could use honey, sugar, or whatever sugar alternative you prefer.

You can also add a small amount of sugar or sweetener of choice to the whipping cream.

For the berries, I prefer strawberries or raspberries with the chocolate but you can use what you want. I’ve used a mixture of berries as well. You can use fresh or frozen berries but be sure to defrost the frozen ones!

If you don’t want the fat of the whipping cream, substitute your favorite topping.

I hope you enjoy your flourless chocolate cake. Let us know how it turns out if you make it.

Flourless chocolate cake

Don’t forget to check out our other recipes on the Becoming Elli website and that our ebook Fitness Food is available.

Embracing Vegetables with a Delicious Vegetable Soup

Vegetables are primarily carbohydrates (not a lot of fat or protein), but the fiber, flavor and undeniable vitamins in vegetables make them a “go-to” food choice for most people wanting a healthy diet.

In 2019, we kicked off the Vegetable Challenge at the Becoming Elli Community with Jill’s blog post and also talked about it in this week’s podcast. We realize that trying one new vegetable a week – 52 new vegetables in 2019 – may be difficult for those who have been working on increasing vegetables intake for years, so we modified it a bit.

Jill has found some vegetables that she has never tried before with purple Brussel sprouts. That is saying something, because she’s adventuresome when it comes to trying new things!

I’m planning on trying to cook my vegetables in a new way. So far I’ve been falling back to my favorite ways of eating vegetables – chopping them up into a salad with olive oil, cider vinegar and lemon juice… or tossing them in olive oil and roasting in the oven. These two ways are very ingrained in meal prep for me now.

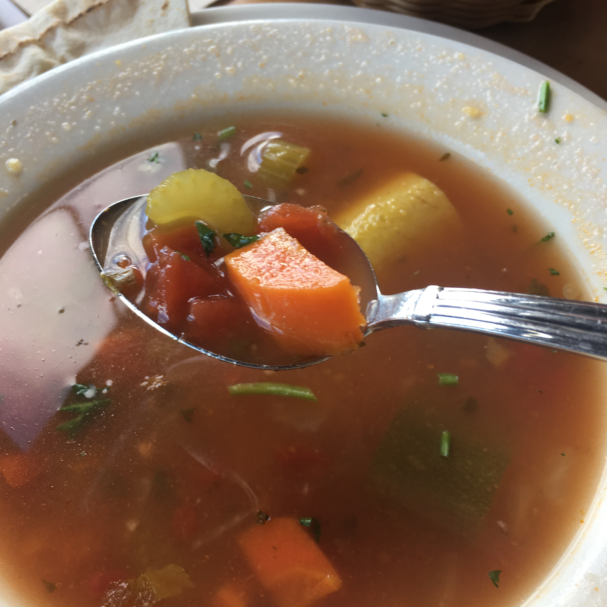
I was thinking about my vegetables when when I had the V9 soup for lunch at my favorite Mediterranean restaurant. It has nine vegetables in it. Although the menu suggests adding feta, I just stayed with the soup.

Each time I try to recreate it at home, I usually end up using different vegetables.

While I was I was counting points (or points plus) with the WW program during my 2007-2012 Weight Watchers phase, I would make something I called Zero Point Soup. It was filled with vegetables and I’d enjoy a large bowl of it before dinner.

It has a tomato broth and is chock full of vegetables with parsley on top.

Here’s a similar version of the V9 soup recipe from the Wine and Anarchy< website. They also love this soup.

Here is my version of this Delicious Vegetable Soup

  • 4 tablespoons olive oil
  • 2 cups chopped onions
  • 2 cups celery, peeled and chopped (approximately 2 medium)
    — saute and then add to a large soup pot
  • 2 quarts water
  • 2 cups cabbage (green or red)
  • 1/2 cup broccoli (I feel it takes over the soup if there is too much broccoli)
  • 2 cups carrots, peeled and chopped into rounds (approximately 2 medium)
  • 2 cups zucchini, chopped (approximately 2 medium)
  • 2 cups summer squash (approximately 2 medium)
  • 1 cup peeled and diced sweet potatoes
  • 2 cups chopped fresh green beans
  • 2 large cans diced tomatoes
  • 1 cup frozen corn or one can corn

Optional – serve with chopped fresh parsley leaves

My version is very heavy on the vegetables and looks more like a stew! Sometimes I when I make this I will add quinoa to put some protein into the soup without adding meat.

With the incredibly low temperatures expected next week, I think this weekend is a great time to make a big pot of soup! I just hope that next August/September I think about making a lot of this soup and canning it. It would be great to buy vegetables when they are in season!!

If this post inspires you to make some vegetable soup, consider posting a photo with your recipe on our Facebook page: https://www.facebook.com/BecomingElli/

Roasted Squash Seeds

It’s fall and winter squash is showing up in the produce section. Pumpkins are also making an appearance. That means it’s time for roasted squash seeds.

Chris shared a great recipe for pumpkin pie spice squash soup the other day. The first step is to cook the squash. Wait! Don’t throw those seeds away. You can roast them and make a delicious snack.

Roasted Squash Seeds

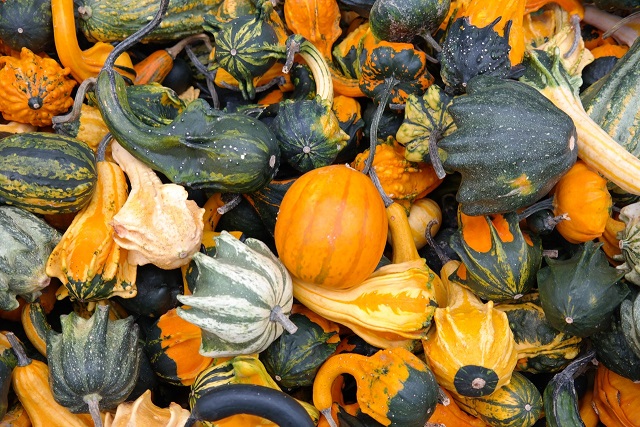
I’m sure you’ve had pumpkin seeds and you may have even roasted your own. But most of the winter squashes have seeds that can be roasted. It doesn’t matter if you’re using an acorn, butternut, spaghetti, or carnival squash.

I’ve bought squash just because I wanted the seeds to snack on. I end up making soup or roasted vegetables with the squash but I really want to scoop out those seeds and roast them.

My process of roasting squash seeds is a little convoluted but is worth it.

Directions for Roasted Squash Seeds

Preheat the oven to 325.

Cut the squash in half and scoop out the seeds and stringy flesh and put into a bowl.

Roasted squash seeds

Separate the seeds from the flesh. I run water into the bowl, which helps clean the seeds.  Get as much of the goopy stuff off that you can. You might want to dump the seeds into a colander and run more water over them to get the last bits of squash off the seeds.

Roasted squash seeds

Put the seeds into a small saucepan and fill with water. Bring to a boil and cook for about ten minutes.

Roasted squash seeds

Drain the seeds and then dry them as thoroughly as you can. I often end up wrapping them in a towel to dry them. Be sure to get all of the seeds that stick to the towel.

Roasted squash seeds

Put the seeds into a bowl and add about a tablespoon of oil. You can use olive oil, melted coconut oil, avocado oil, or whatever you prefer.

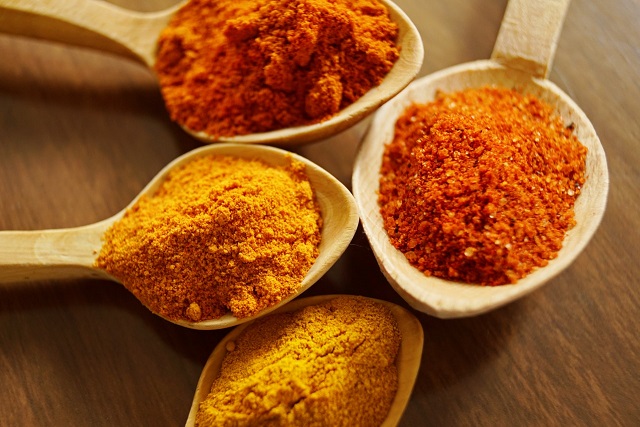
Salt the seeds and add any spices you like. You can use Try curry or a taco seasoning or go with this pumpkin pie spice to stick with the fall pumpkin theme.

Line a baking sheet with foil or parchment paper and spread the seeds out in the pan. Try to spread them out and not have them clumped in the middle.

Roasted squash seeds

Roast for 10 minutes and then stir and return to the oven. Check the seeds about every five minutes. The seeds are ready when the outsides are crispy and the insides are tender. If you hear the seeds popping, they’re definitely ready to come out.

Roasted squash seeds

Let the seeds cool and then serve. Store any uneaten seeds in a air tight container. These are good as snacks, toppings for salads, or as a garnishment for your squash soup.

Pumpkin Pie Spice: How to Make Your Own

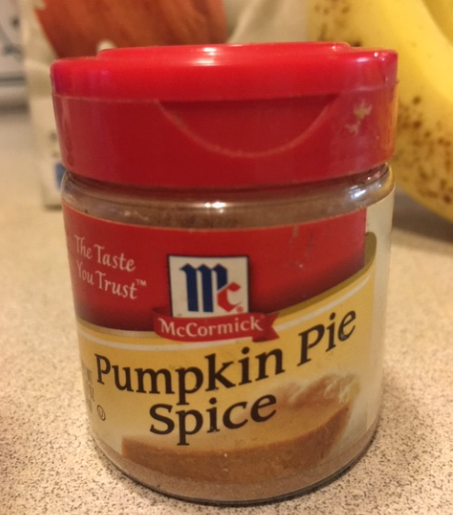
So Chris recently gave us a couple of great recipes to use pumpkin pie spice. I read them, thinking these sound great. I’m kind of weird and don’t often buy spice mixtures so I don’t have a jar of pumpkin pie spice sitting around my kitchen.

But hey, I do have jars of spices. When I make pumpkin pie, which is one of my favorite pies, I measure out all the spices. I also make my own taco seasoning, but we’ll save that recipe for another day.

But it does make life easier to have a jar of pumpkin pie spice available, so I sometimes make my own. Making your own blend of pumpkin pie spice is the easiest thing. It really doesn’t get any better than this: fast, easy, and tastes good.

Pumpkin Pie Spice

Ingredients

3 tablespoons. ground cinnamon

2 tsp. ground ginger

1.5 tsp. ground cloves

2 tsp. ground nutmeg

1.5 tsp ground allspice

Directions

Mix together and pour into a clean unused spice jar.  This makes about 5 tablespoons of pumpkin pie spice and is enough to make five or six pumpkin pies.

Note:

  • You can increase the cloves and ginger for a bit more “bite” in your pumpkin pie spice or you can increase the cinnamon for a more “homey” kind of flavor.
  • If you don’t have all the ingredients, you can probably omit at least the nutmeg and the allspice. The Libby’s Famous Pumpkin Pie recipe found on the back of the pumpkin puree can only uses cinnamon, ginger, and cloves and I love that pie.
  • pumpkin pie spice

Turmeric

If you decide to make Chris’ recipes, I’m going to suggest a variation.

Smoothie

Sprinkle some turmeric on top for some added zest. Turmeric is a great anti-inflammatory spice. I love to make golden milk (I’ll provide that recipe soon) and it includes turmeric. I think just a slight sprinkle is a good option for this smoothie.

Squash Soup

When you make the soup, add half a teaspoon of turmeric to the soup. It will make the soup color just a bit richer and adds additional anti-inflammatory properties to the soup.

Two Delicious Recipes to Satisfy the Pumpkin Pie Spice Craving

In the autumn I am one of those people who seeks out a pumpkin pie spice fix. Knowing that a pumpkin spice latte at the local coffee shop has way more empty calories than I need, I’ve looked for other ways to satisfy this itch.

Both of these recipes utilize the Vitamix blender, which is one of my very favorite appliances that I’ve ever received as a gift. (Every since the year I received a toaster and a vacuum ar a birthday gift, my practical husband has been more careful about buying me appliances as a gift.) The Vitamix brand is pretty pricey, so he ended up getting a reconditioned one that has served us well for more than 5 years.

You probably can make either of these recipes using a NutriBullet or another type of blender.

Pumpkin Pie Spice Smoothie

With just three ingredients, it’s a simple go to for when I want something with pumpkin sweetness. It’s funny, but this recipe doesn’t actually have any pumpkin in it.

Ingredients: Almond milk, banana and pumpkin pie spice.

Directions: Add all three ingredients to the blender and turn on for about 2 minutes. Using less milk gives a very thick smoothie. More milk and less banana gives a thinner texture. It’s up to you.


Pumpkin Pie Spice Squash Soup

Make it it in the fall. This thick soup tastes just like pumpkin pie filling to me! It provides lots of fiber and extremely delicious. Using the Vitamix blender, it is a 6 minute recipe, if you bake the squash ahead of time. I like using butternut and acorn squash the best.

I usually don’t measure, so my quantity and texture varies to match my mood.

Ingredients:

  • Squash (butternut, acorn and/or zuchinni)
  • 15 oz can of pure pumpkin
  • dash of vanilla
  • some (1/2 cup?) almond milk
  • big dump (2 teaspoons?) of pumpkin pie spice

Directions:

The night before, bake your squash.

Cut squash in half, scrap out seeds. Place inside face down on tinfoil covered cookie sheet and bake or roast the squashes in the oven. I figure 40 minutes at 350 to 375 degrees. It depends on the size of the squashes and how accurate your oven is. Refrigerate.

(You can make this all in one night, but I like to prep some ahead of time and just do the final prep all on the night I’m going to eat it.)  Then on the night you are making the soup you just assemble the ingredients into the blender.

  • Put almond milk in the bottom of the blender. With liquid in the bottom, it blends better.
  • Scoop the squash out of the skin.
  • Add 1/2 or a full can of pure pumpkin (NOT pie filling, just plain pumpkin) in a 15 oz can.
  • Add a dash of vanilla, a little more almond milk and a big dump of pumpkin pie spice.

Set blending on soup mode and turn on.

If its too thick, stir in a little more almond milk. Too thin, more pumpkin or squash, if you have it.

Do you love pumpkin pie spice as much as I do? Share a link to your favorite recipe. Hate pumpkin spice? (Sorry!) Let me know what you like better when the seasons change.

Disclosure: this post links to the Amazon affiliate program, where a portion of your purchase helps to offset the expenses associated with the Becoming Elli podcast and website.

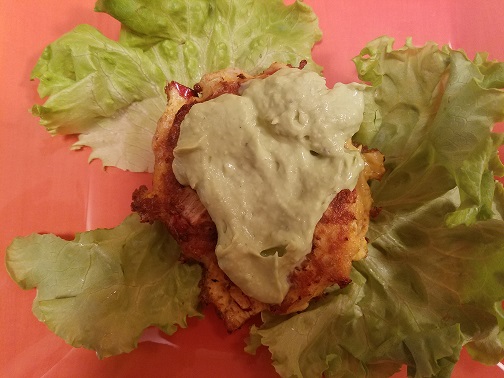
Salmon Veggie Patties with Avocado Lime Sauce

These salmon veggie patties are great. For one reason, they don’t have filler or, at least, no bread crumbs, no ground pork rinds, and no almond flour. Just do a search on salmon patties and you’ll see what I mean. Instead, these patties have vegetables as filler. I think you can make great salmon patties using vegetables in place of the crumbs.

As usual with my recipes, feel free to swap in what you have and leave out what you don’t have.

Salmon Veggie Patties Ingredients

1 can salmon

1 to 2 eggs, depending on consistency

½ cup diced onion

½ cup diced celery

½ cup diced bell pepper

Salt and pepper

Garlic Powder

Oil for frying

Avocado Lime Sauce Ingredients

½ to 1 Avocado

Lime Juice

2 Tablespoons Greek Yogurt or Mayonnaise

1 Clove garlic, crushed

1 Tbs. Parsley or Cilantro

Directions for Salmon Veggie Patties

Drain the salmon and break into chunks in a small mixing bowl.

Whisk the egg and add to the salmon.

Add the vegetables and mix well.

Make the patties and let them sit for a while. if you’re letting them sit more than 5 or 10 minutes, refrigerate them.

When it’s time, heat oil in frying pan.

Gently place patties in pan. After about 5 minutes or when the side is nicely browned, flip and cook the other side.

Directions for Avocado Lime Sauce

Blend the ingredients in a blender or food processor. Add more juice or yogurt/mayo to taste and to get the consistency you want.

Serving

Serve the patties on top of some greens and spoon some of the avocado lime sauce on top.

Notes:

I’m using a 6 oz. can of Wild Alaskan Pink Salmon. If you use the larger can of red salmon, double the other ingredients.

I had red bell pepper on hand. Use green if that’s what’s in your fridge. I think you could easily add different vegetables to these. Just make sure they’re chopped into small enough pieces. I think spinach might be an excellent addition.

You can fry these in olive oil, butter, ghee, coconut oil or avocado oil. If you eat peanuts, peanut oil would also work. Use the oil you prefer.  I’m experimenting with avocado oil and it seems to have worked well,

Because there is no filler added to these, the patties will be sloppy. Don’t fret over it, just fry them up.

If you like spice, feel free to add more spice to the patties. Cumin and turmeric might be good choices.

Salad Recipe with Cucumber, Feta, Tomato, Chick Peas

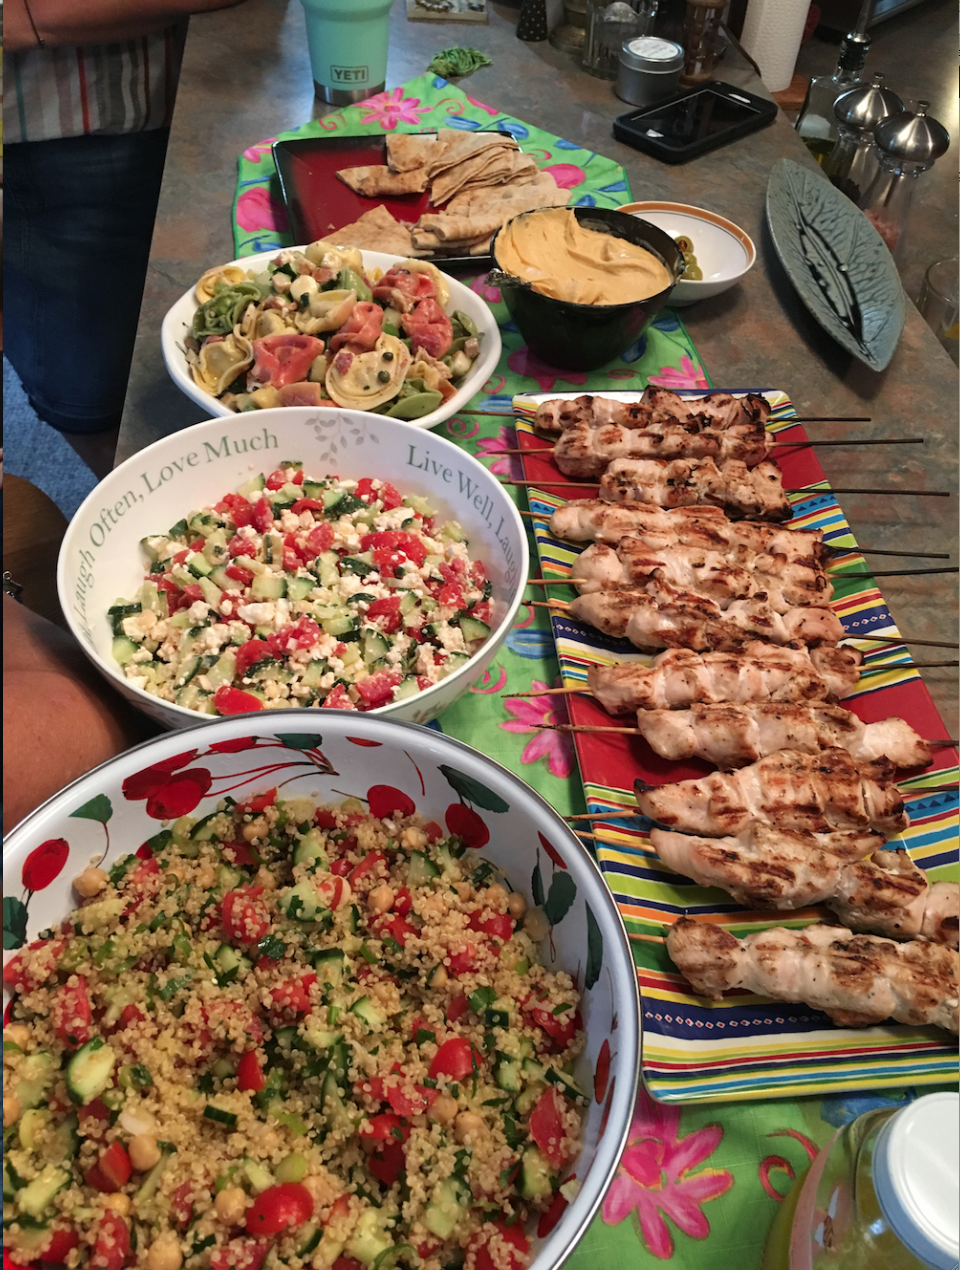
Last weekend I enjoyed a Mama Mia movie party with several friends. We had a delicious spread of various Mediterranean salads and chicken on the grill. I decided to recreate the cucumber feta tomato chick pea salad for a birthday party! Light, delicious, and easy to make – this is a guilt-free enjoyable salad that is stays fresh in the summer humidity. I find that I really enjoy salads that are based on more than just lettuce. – Chris

cucumber feta tomato chick pea salad

cucumber feta tomato chick peas salad recipeIngredients:

  • cucumbers
  • chick peas
  • grape tomatoes
  • onions
  • feta cheese

Directions:
Wash outside of cucumber. Slice cucumber down the length into dill pickle sized spears. Cut into bit size pieces.
Open and drain chick peas (also known as garbanzo beans.) Pat dry before combining with other ingredients.
Slice grape tomatoes into quarters.
Dice onion.
Crumble the feta cheese into pieces smaller than the tomatoes.
Combine the ingredients gently.

Dressing:
Combine oil and lemon juice, salt and pepper together.

Pour dressing over salad and turn the ingredients several times to coat.

Notes:
I only used half of the package of feta cheese.You can modify the quantity of ingredients to match what you have on hand and to match your taste buds.

Refrigerate. Tastes great same day or a couple days later. Easy to make a day ahead of an event.

Some people might like to add olives (pitted and sliced) and parsley or cilantro to add more color and flavor.

Seedless cucumbers might be nice in this if you don’t care for cucumber seeds.

You may want to swap out white onions for a red onion or a sweet onion instead.

I’ve made this before using Roma tomatoes and even snuck in some celery to bulk it up with more vegetables.

This is a good choice for a salad that needs to sit out on a table during a picnic or an afternoon party because it has no ingredients that will spoil in the heat. I always avoid salads with mayonnaise (like potatoe salad or some pasta or cole slaws) at picnics… unless I know that they have been properly refrigerated or kept cool in ice. Nothing worse than an upset stomach from food that was left out too long.


Banana Pancakes

Banana Pancakes
Easy, fast and healthy. Although they taste different than traditional pancakes, some say that they taste more like crepes.

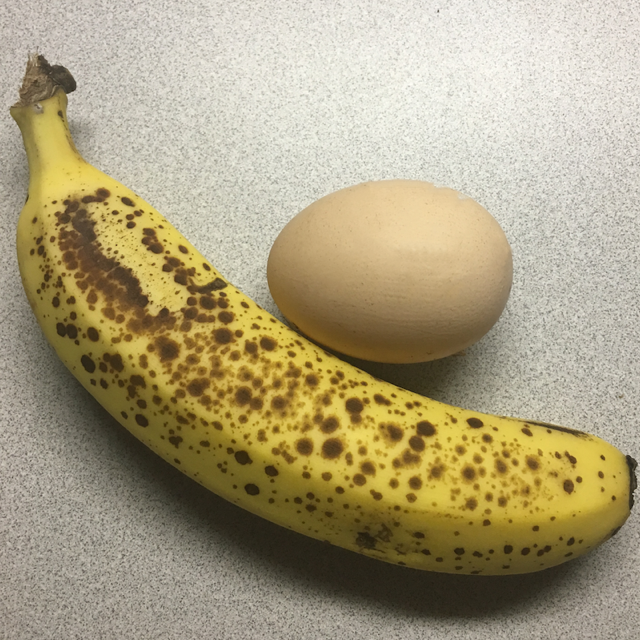
1 egg
1 banana

Mash together egg and banana with fork.

Place a small amount of mixture on a hot skillet.

Don’t make large pancakes as they are more difficult to flip than “traditional”. Keeping them smaller like the size of a quart jar lid will help with the turning.

Get the spatula underneath most of the pancake before you try to flip for better turning results.

Brown and stack to serve.

Options to dress them up and make them your own:

Add a Tablespoon of milk to make it the desired consistency. If you like thinner pancakes, you may need 2 or 3 Tablespoons of milk, depending on size of egg and size of banana.

Or add some honey if you like them sweeter. Honestly, I was surprised how sweet they were with just the flavor of one banana.

Some people like to add a little bit of vanilla, like a quarter teaspoon, for flavor

Top with powdered sugar or maple syrup or jelly. Or another banana sliced up into circles.

Spray olive oil in pan. Or put a tab of butter in the pan. If you use a cast iron pan or teflon, you may not need anything to keep them from sticking.

Want them fluffier? Add a little baking powder to make them rise.

Make sure you cook them through and through, but not too high of heat or they may burn. They cook fast!

You can see that being patient and mashing the banana completely makes for smoother pancakes.

I often eat a banana before working out and fried eggs afterwards, so my stomach is very used to these two foods. It is very rare that I have pancakes. It’s a fun change of pace!

Did you try and like these? Add anything special? Did I miss something? Let me know by leaving a message below or sending me an email at Chris@becomingelli.com.

Chicken Quinoa Tomato Salad for the Family Reunion

Once a year I play softball, hop around inside a burlap sack, try to run/walk with a partner with one of our legs in a sack, play crochet, and race to the other side while balancing an egg on a spoon.

You got it! This Saturday is a family reunion.

All different ages and generations gather together. It’s a blessing to have such a big family.

It’ll be a time to catch up and reconnect. We will play corn hole. bocce ball, badminton and horseshoes.

I’m glad that my fitness level is strong enough to participate in the games without worrying about killing myself.

I didn’t used to be like that. In fact the other day, I ran across a photo of myself taken years ago at one of the family reunions, before I started really focusing on getting fit and strong. Notice the diet coke can in one hand, camera in the other. It took a long time to quit my diet coke habit and now it really gives me a stomach ache if I drink even a small amount.

Because I felt too out of shape to join in the games, I spent a lot of time going back up to the food table and yes, I felt like I’d gain about 3 pounds in one day.

Of course the family reunion always involves a whole lot of food and usually a huge landscape of high calorie choices.

Pasta with meatballs, pizza, fried chicken, and all kinds of desserts – cake, cookies, brownies, jello-pretzel-cool-whip and fluffy stuff that I don’t know what’s in it except sugar and sweetness. Nary a veggie tray with carrots, celery, broccoli and cauliflower to be found, but that is because everyone brings their most delicious dishes.

Believe me, it’s tempting to overeat. Today I’m going to try to remember all the good strategies for dealing with the food that we’ve discussed in the podcasts.

I’ll spend my time playing games and talking with people I haven’t seen since last reunion.

When it is time to eat, I’ll try to remember the tricks Melanie and Nancy shared with us for not over eating.

  • Survey the table completely before putting anything on a plate.
  • Include fresh veggies, whole food choices when possible.
  • If I really want something that has lots of calories, I’ll take a tiny size portion.

Meanwhile I’ll be drinking lots of water, so I don’t eat when I’m really thirsty. It’s been so very hot lately, I’ve been drinking more water than usual, so that’s a good tip anyway! Gotta make sure I have salt in my diet too.

Chicken Quinoa Tomato Salad

Today, I’m making a new healthy salad recipe and I thought I write it up to share it on Becoming Elli while I’m making it this morning.

First, I prep the salad ingredients for my Chicken Quinoa Tomato salad.

Baste 4 chicken breasts in salt water for one hour. Rinse off and put on a cookie sheet to bake for 40 minutes. (I put the oven on 400, but I suspect my temperature gauge is slightly off.) The salt water locks in the moisture in the chicken so it doesn’t dry out.

Slice several red peppers into strips.(Four nubs on the bottom are females, three are male. The female peppers are supposedly sweeter with less seeds.) Coat with olive oil. Roast in oven for 30 minutes.

Cook 2 cups of quinoa in 4 cups of water for 15 minutes. Take off heat. Fluff with fork. Put lid on for 12 minutes. Fluff with fork.

While the chicken and peppers are roasting and the quinoa is cooking, chop up all the veggies:
Cut 2 pints of grape tomatoes in half.
Dice half of a small Vadelia onion.
Cut a cucumber into strips and dice.
Cut 3 stalks of celery into strips and dice.
Dice up a small handful of fresh basil

Combine ingredients in a large bowl.
Zest 2 lemons. Squeeze juice over veggies.

After chicken and red peppers have cooled a bit and cut into cubes.
Allow quinoa to cool. Fold everything together in the big bowl. Salt and pepper to taste.
Transfer to a smaller serving bowl if desired.
Chicken Quinoa Tomato Salad

I am a slow cook, so it took me a while to get this all done.

But now that the salad is ready, I’m really looking forward to seeing everyone at the reunion and having some fun!

The Peanut Butter Wars: Natural Peanut Butter or Not

This isn’t exactly a recipe but I thought I’d write about peanut butter. Chris and I recently discussed peanut butter and I was shocked to learn that she eats Jif peanut butter. I don’t know why but I thought nobody bought regular peanut butter anymore. I said I only eat natural peanut butter and that my favorite is Smuckers Natural Peanut Butter.  Of course, there are lots of different brands of peanut butter and I’ve just selected the ones that we discussed. Your peanut butter might be a bit different.

Ingredients

Here’s a photo of the ingredients in Jif:

Yes, it says:

Made from roasted peanuts and sugar, contains 2% or less of: molasses, fully hydrogenated vegetable oils (rapeseed and soybean), mono and diglycerides, salt.

I also see that this label reveals that the J.M. Smucker Company now owns Jif as well as their natural brand.

Here’s a photo of the ingredients in Smucker’s Natural Peanut Butter:

Natural Peanut Butter

It says:

Ingredients: Peanuts, contains 1% or less of salt.

You can buy an unsalted version but I usually don’t.

Here’s the rest of the label:

Natural Peanut Butter

Nutrition Facts

Let’s compare the nutrition facts of these two peanut butters:

Natural Peanut Butter


So, not all that different except that the sugars are increased due to the sugar being added to Jif. For some reason, the protein changes slightly too.

That Darn Oil or Mixing Natural Peanut Butter

So why doesn’t everyone buy natural peanut butter? Because of the darn oil that separates from the peanut butter. You buy a jar of peanut butter and to use it, you first have to mix in that oil.

I used to do this with a spoon and I’d end up with the peanut butter all over my hands. It was a mess.

Then I would flip the jar over while it sat in the pantry waiting to be opened. Every so often, I would put the jar upside down and then later put it right side up again. That did actually help with the oil somewhat.

One day I was pondering some of the mysteries of life and wondered why nobody had ever invented a tool to mix the oil into the peanut butter. I had an ah-ha moment and decided to try something. It worked and now I mix my peanut butter this way all the time.

I take my hand mixer and insert one beater. I then hold the peanut butter jar firmly (the firmly part is important), insert the beater and turn the mixer onto low. It works great. The peanut butter is mixed without spilling all over the counter, jar, and my hand. This isn’t hard and it works great.

Here’s a demo of mixing peanut butter with a mixer:

I forgot to include a shot of the finished product so here it is:

Blended peanut butter

I’ve mixed peanut butter in both glass and plastic jars. Either way, it’s fine. You do have to make sure you hold the jar firmly and start the mixer on slow.

Some time we can discuss the strengths and weaknesses of almond butter vs. peanut butter. All I’ll say right now is that my stirring method works for almond butter too. It probably works for any kind of nut butter.

I know there are lots of other peanut butters out there. Does anyone have a brand to recommend that doesn’t have anything other than peanuts and salt added that doesn’t have to be stirred?

« Older posts Newer posts »

© 2026

Theme by Anders NorenUp ↑